What is the Fisher Spas™ Audio & Wi-Fi Kit and should I buy this spa upgrade?

Shopping for or just purchased a Fisher™ Spa? Are you thinking of buying an upgrade for your spa? In this article you'll learn about the Fisher Spas™ Audio and Wi-Fi Kit and why it could be the ideal spa upgrade for you, your friends and family.

What is the Fisher™ Audio & Wi-Fi Kit hero

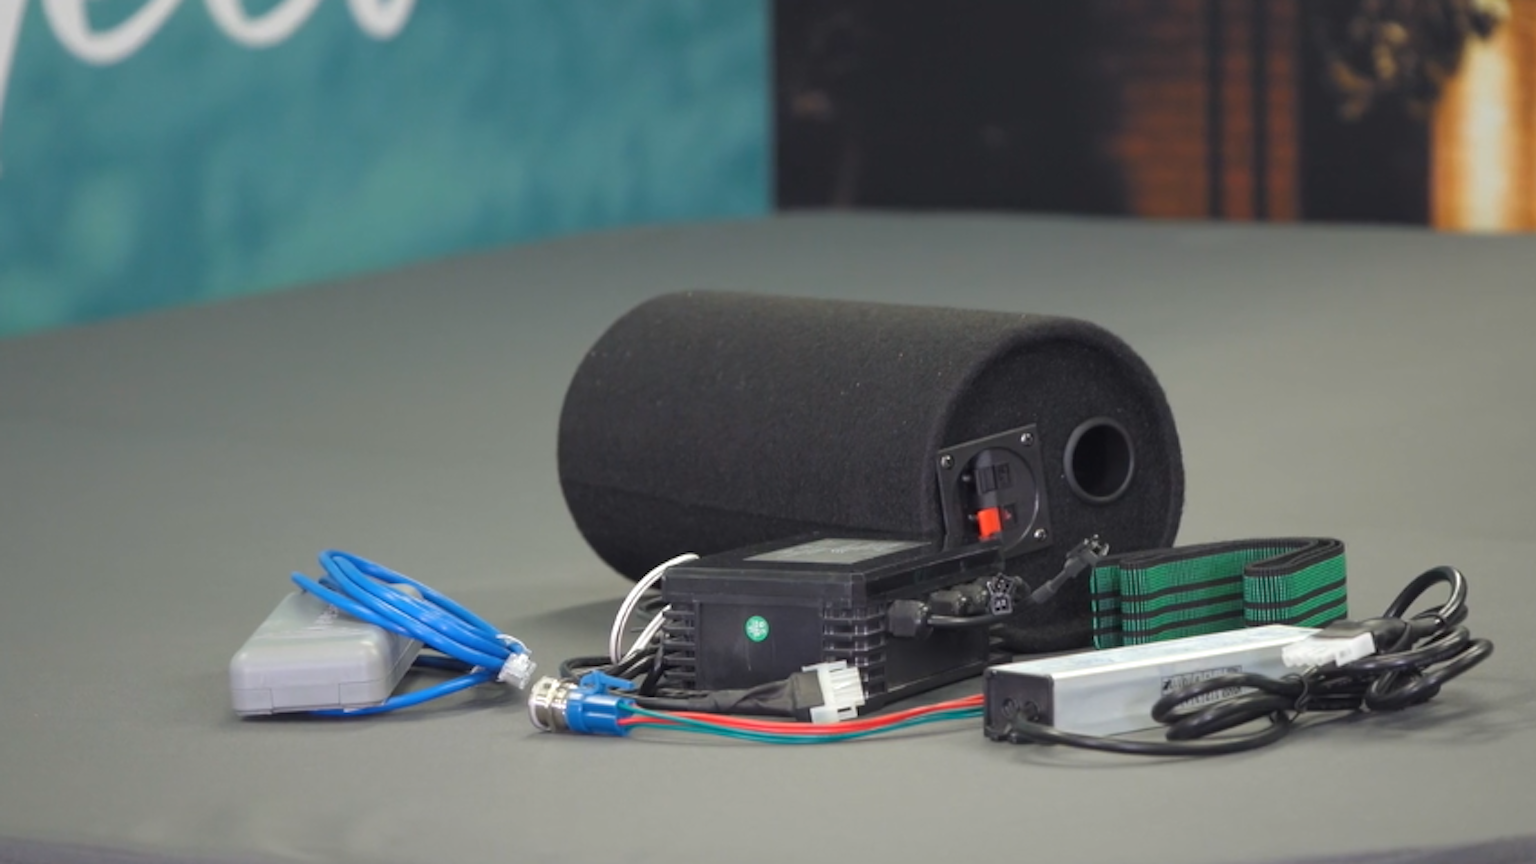
What is the Fisher Spas™ Audio and Wi-Fi Kit?

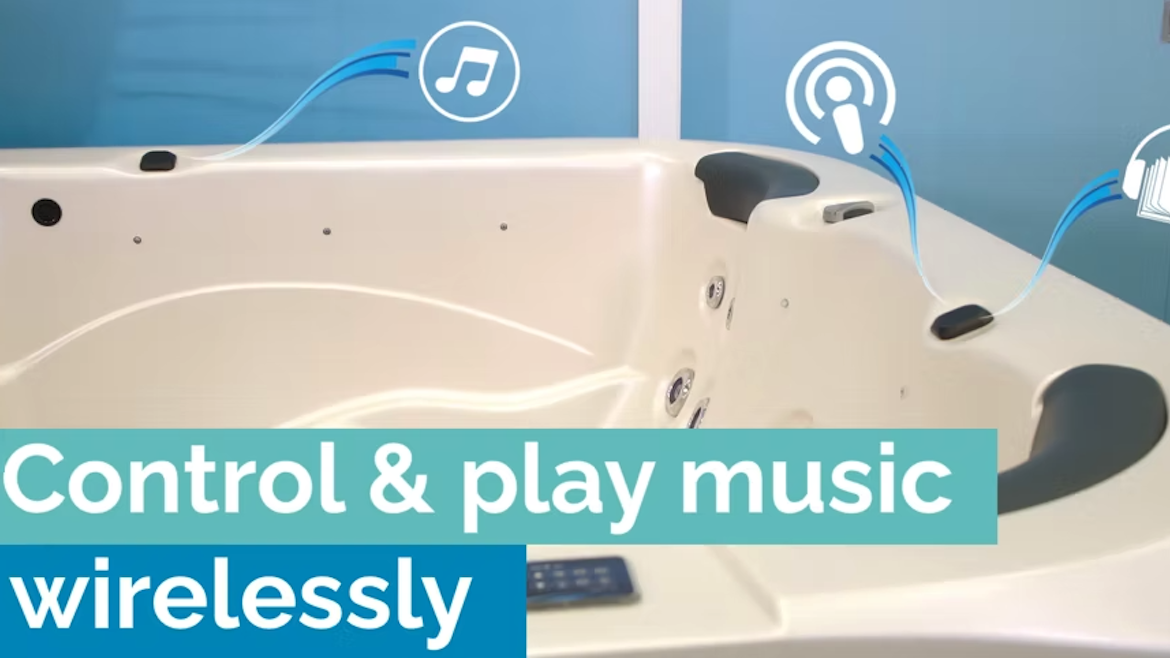
The Fisher Spas™ Audio and Wi-Fi kit is an optional upgrade for your spa that allows you to remotely control, monitor and emit quality sound from your smart device.

Using SmartLink™, the Wi-Fi hardware module included in the kit, you can stream music and audio through its quality stereo system. This is ideal if you want to relax in the spa and listen to your favourite podcast or audio book.

You can also control settings on your spa such as water temperature and lighting by connecting SmartLink™ to the free, downloadable app SmartLink™.

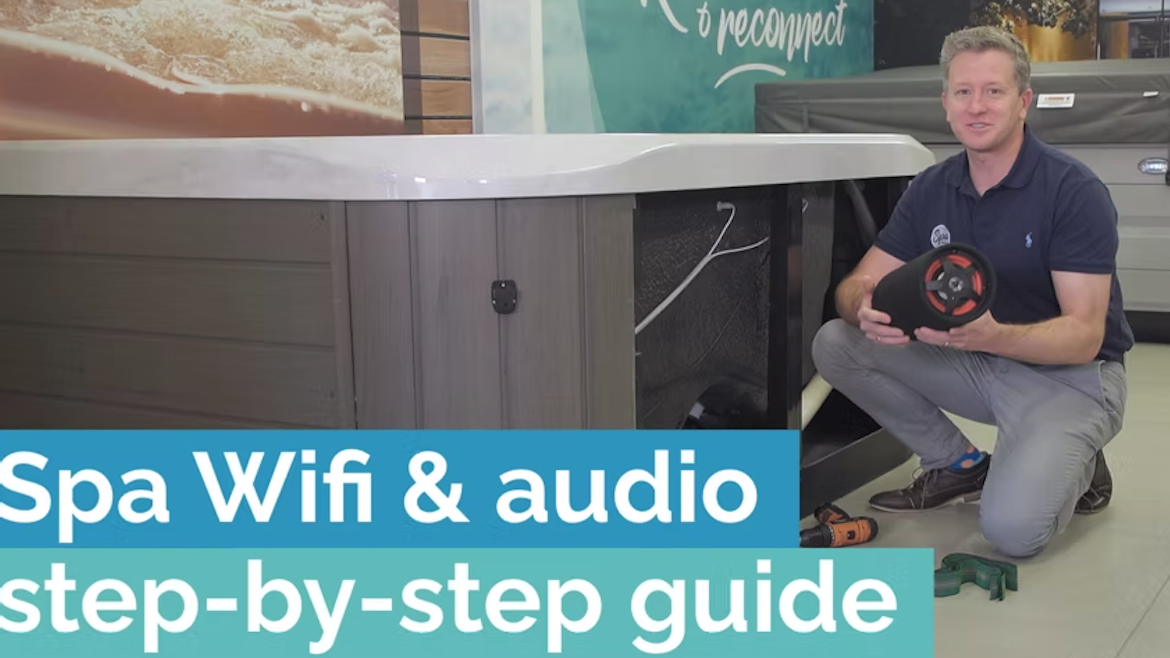
Watch this video to learn more about the features of the Fisher Spas™ and Wi-Fi kit.

Please note: The SmartLink™ App was formerly called the "SpaLink App". SpaLink has been replaced by the new, improved SmartLink™ App.

Is the Fisher Spas™ Audio and Wi-Fi kit the best spa upgrade for me?

Does your idea of relaxing in a spa include streaming music, audio or listening to a podcast through a quality sound and stereo system? Do you also see the appeal in being able to control all the settings on your spa remotely? Then the Fisher Spas™ Audio and Wi-Fi kit is an upgrade you should consider.

Watch: Create a smart spa with Fisher Spas™ Audio & Wi-Fi kit

If listening to different forms of audio in your spa isn’t a top priority for you or you don’t think you will be away from your spa frequently and need remote access to its settings, then the Fisher Spas™ Audio and Wi-Fi kit may not be an upgrade to consider.

What is included in the Fisher Spas™ Audio and Wi-Fi kit?

The Fisher Spas™ Audio and Wi-Fi kit comes with the following components -

  • Screws
  • Transformer
  • Hydravibe™ stereo
  • Hydravibe™ power button
  • Hydravibe™ subwoofer
  • SmartLink™ Wi-Fi
Fisher Spas Audio and Wi-Fi Kit

Is the Fisher Spas™ Audio and Wi-Fi kit available for all Fisher spas?

The Fisher Spas™ Audio and Wi-Fi kit is compatible with every spa and swim spa from Fisher Spas™ and except the Fisher 2™.

How do I install the Fisher Spas™ Audio and Wi-Fi kit?

Installing the Fisher Spas™ Audio and Wi-Fi kit is straightforward. To help you get the system up and running, you can either view the step-by-step video or follow the written instructions provided below.

Step-by-Step Guide to Install Fisher Spas™ Audio Wifi Kit

Important note: Please turn off the spa before following the steps below.

Step 1: Locate the Equipment Bay

Identify the location of the spa’s equipment bay. Depending on the model of your spa, the equipment bay is typically under the keypad. You may check the manual for your model's specific equipment location.

Your spa should have two pre-drilled holes with blanking caps for the kit. If not using the kit, leave the caps in.

Step 2: Remove Cabinet Panel to Access Black Box

Remove the cabinet panel to access the black box where the stereo and transformer will be mounted. This box already houses the Ozone generator.

Step 3: Mounting the Transformer & Stereo

Mount the transformer using two small screws and attach the amplifier with four small screws. Ensure you’re using the correct length screws to avoid piercing any pipes behind the black box.

Important: The Fisher™ WiFi and Audio Kit includes two sets of screws with different lengths: • Use the longer screws to secure the Sub Speaker in place. • Use the smaller screws for mounting the Stereo & Transformer into the black box.

Step 4: Attach the transformer.

Use two small screws to install the transformer.

Step 5: Attach the amplifier

Use four small screws to install the amplifier to the black box.

Step 6: Connect Speaker Cables

Connect speaker cables 3, 2, and 1 to the amplifier. You'll notice that that there is a spare cable, please disregard this cable.

Step 7: Connect the power supply to the amplifier

Once the cables are connected, the next step is to connect the power supply to the amplifier using white two-pin connectors.

Step 8: Connect Power Supply to the SpaNet™ Controller

Before connecting the power supply to the SpaNet™ Controller using the white two-pin connector, ensure that you plug it in with the two outer pins having flat sides. The same rule applies to the plug – there's only one way to connect it.

Step 9: Prepare Subwoofer Installation

Prepare the mounting plate for the subwoofer. Locate and remove the appropriate cabinet panel. Make sure to install the Audio WiFi Kit before fixing the spa into position.

Step 10: Mount the Subwoofer

Mount the subwoofer on the speaker base plate and secure it with the provided strap.

Step 11: Wire the Subwoofer to Amplifier

Wire the positive and negative connectors of the subwoofer to the amplifier, making sure the wires are properly seated.

Step 12: Install the SmartLink™ Module

Notice the two holes in the cabinet panel. Take off the caps and unscrew the panel.

  • Push the SmartLink™ cable through a hole.
  • Stick the SpaNet™ module to the cabinet using its adhesive.
  • Put it vertically on the panel, covering the hole.

Remember: Keep the module vertical, wifi symbol on top for waterproofing and better signal.

Step 13: Install the On/Off Button

  • Start by pressing the latch on the back of the ON/OFF button to remove the button plug.
  • Take off the fastening nut from the back of the button, allowing it to go through the cabinet panel.
  • Secure the button to the back of the panel using the locking nut.
  • Finally, connect the button by plugging it into the connector on the back.

Step 14: Connect the SmartLink™ Antenna to the SpaNet™ Controller

  • Unscrew the front panel of the SpaNet™ controller.
  • Locate Expansion port 1, the third port from the right, labeled as Exp 1.
  • Plug the SmartLink™ cable into Exp 1, ensuring a proper connection.
  • Connect the cable through one of the gaps in the side cord grip.
  • Finally, reattach the SpaNet™ controller panel and secure it with screws.

Step 15: Connect the On/Off Cable to the Stereo Lead

Ensure the On/Off cable is connected to the stereo lead correctly.

Step 16: Reattach the Cabinet Panel

After completing the installation of all components, reattach the cabinet panel.

fisher audio via bluetooth

How do I connect my mobile device to the Fisher™ Audio Hydravibe™ Stereo via Bluetooth?

Connecting your mobile device to the Hydravibe™ Stereo is easy. Here's a step-by-step guide you can follow.

Step 1: Enable Bluetooth on Your Mobile Device

  • On your mobile device or smartphone, go to the Settings.
  • Scroll through the settings options and select “Bluetooth”.
  • Toggle the Bluetooth switch to the ON position if it isn't enabled already.

Step 2: Pair Your Mobile Device with Hydravibe™ Stereo

  • With Bluetooth enabled on your mobile device, it will begin searching for available devices within range.
  • Look under the “OTHER DEVICES” section for a list of available Bluetooth devices.
  • Find and select the Bluetooth stereo device with the pairing name “SPA” from the list.

Step 3: Enter the Bluetooth PIN

  • After selecting “SPA,” you might be prompted to enter a PIN code.
  • Type in the Bluetooth PIN code “5188” when requested.

Step 4: Confirm Connection

  • After entering the PIN, the pairing process should complete shortly.
  • Your Hydravibe™ Stereo device, named “SPA” should now appear as “Connected” on your mobile device's Bluetooth settings screen.
  • Once it is connected, you are ready to stream your favourite music.

Step 5: Play Music and Enjoy!

  • Open the music app of your choice on your mobile device.
  • Play any song, playlist, or audio stream.
  • The sound should now be outputting through your Hydravibe™ Stereo speakers.

What's the 4 digit pin for the Fisher Spa™ Audio Kit?

During the set-up process of your Fisher Spa™ Audio Wifi Kit, you'll be required to enter a four digit pin when pairing with your device.

The 4-digit pin for the Fisher™ Wifi/Audio Kit is 5188.

Summary

The Fisher Spas™ Audio and Wi-Fi kit is a quality package that can elevate your spa experience through the power of sound. If you have been warming to the idea of relaxing with your favourite streamed music, audio book, podcast or the radio around you, then this upgrade could be one to consider.

Five Star Trust Pilot Rating

We are proud that Spa World customers have given us a Five Star Trustpilot rating.