How to install Spa Cover Lifter - Deck-mount or Under spa mount

Looking to install a base-mounted spa cover lifter without the hassle? This guide simplifies the process with easy steps to assemble and secure it efficiently.

Cover Lifter - Deck-mount or Under spa mount

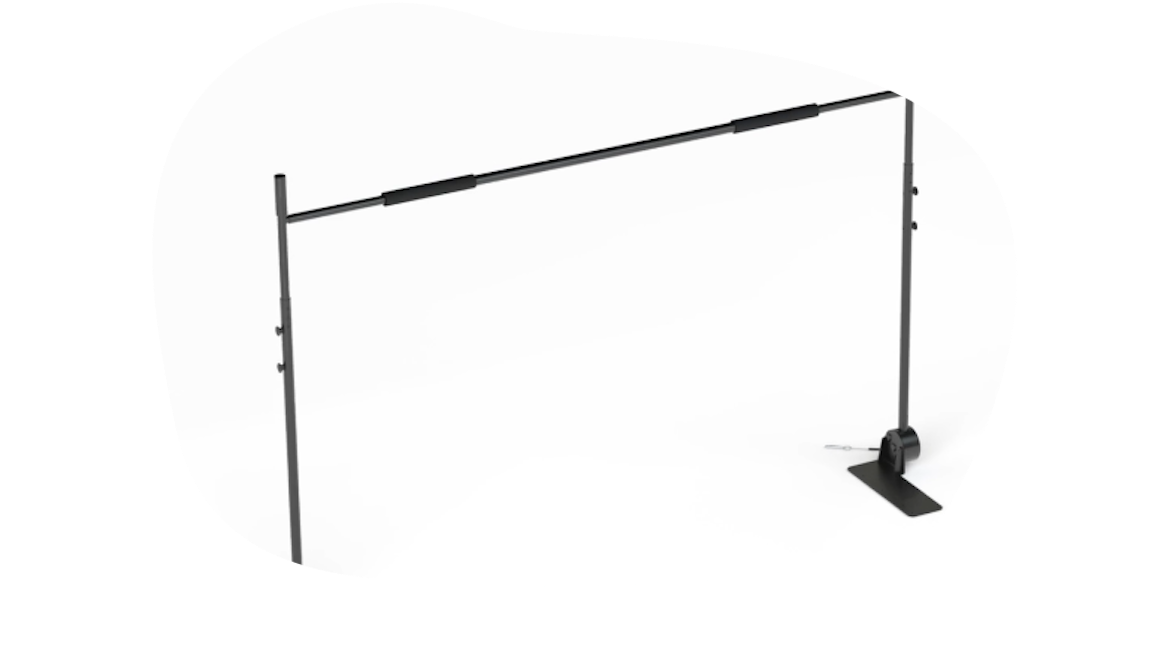
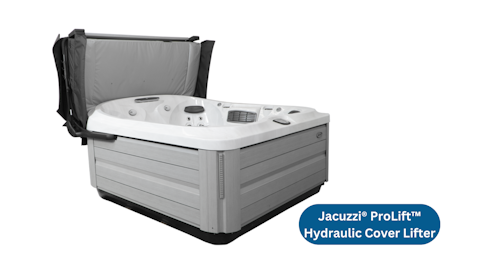
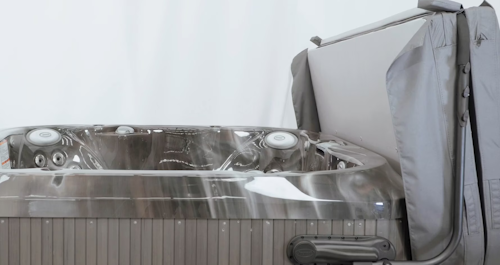
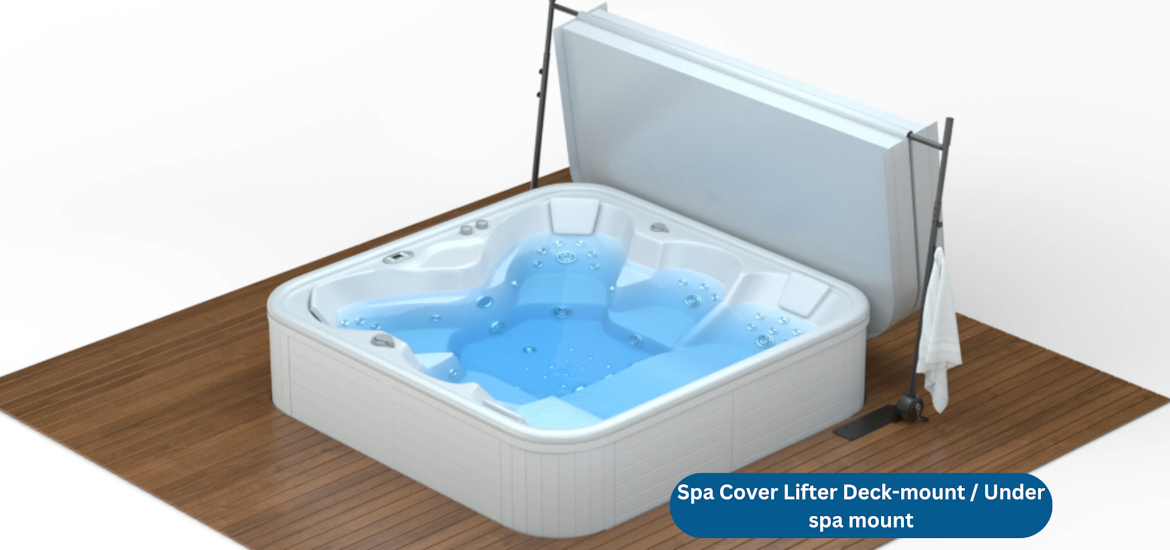
A spa cover lifter makes enjoying your spa easier and more convenient by allowing you to remove and replace the cover effortlessly. It also helps protect your spa cover, extending its lifespan and keeping your spa clean and ready to use.

Installing a cover lifter might seem like a big task, but this guide simplifies the process into easy, step-by-step instructions. With this guide, you’ll have your cover lifter installed in no time, making your spa experience even more enjoyable. Let’s get started!

Key Takeaways:

  • Compatible Spa Models. Works with Vortex™, Fisher™ spas, and Jacuzzi® J-200™ Series (deck or standalone setups).
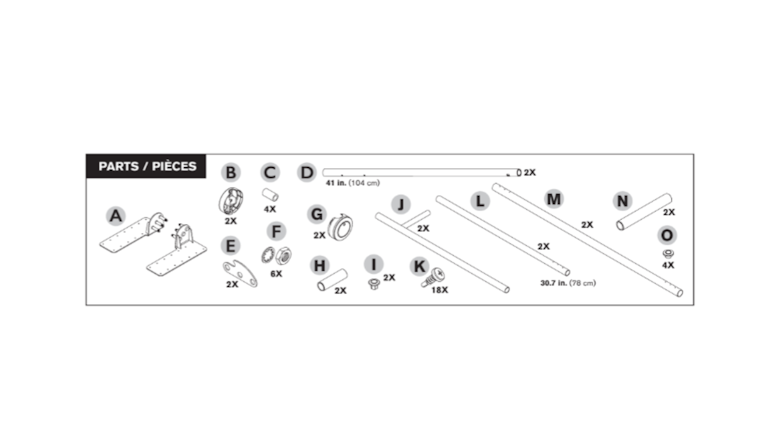
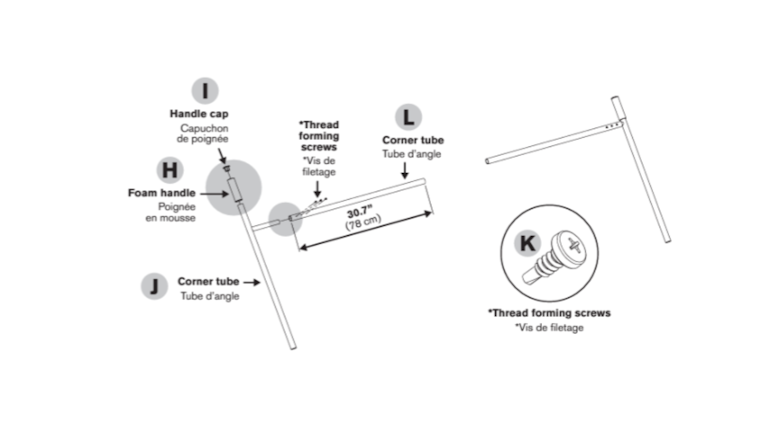
  • Parts Checklist. Includes brackets, side tubes, foam tubes, towel hooks, screws, and more.
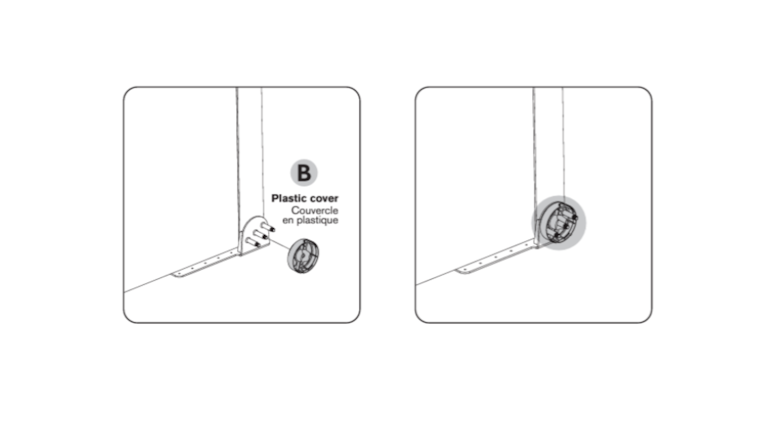
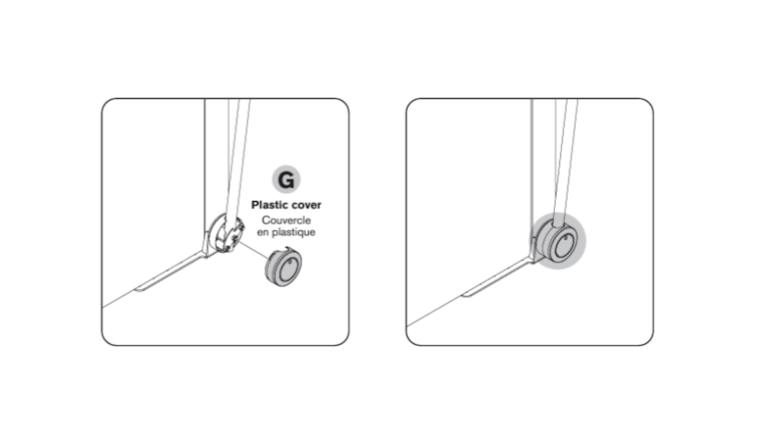
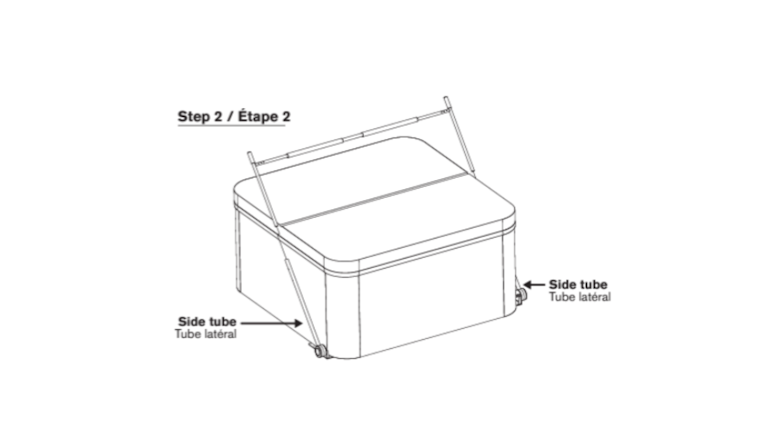
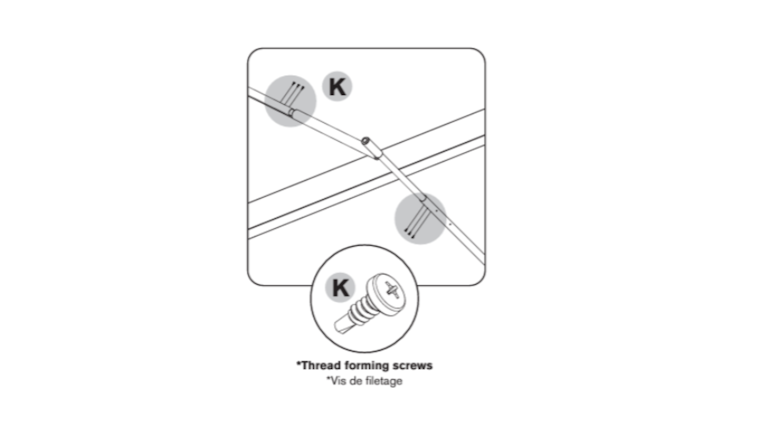
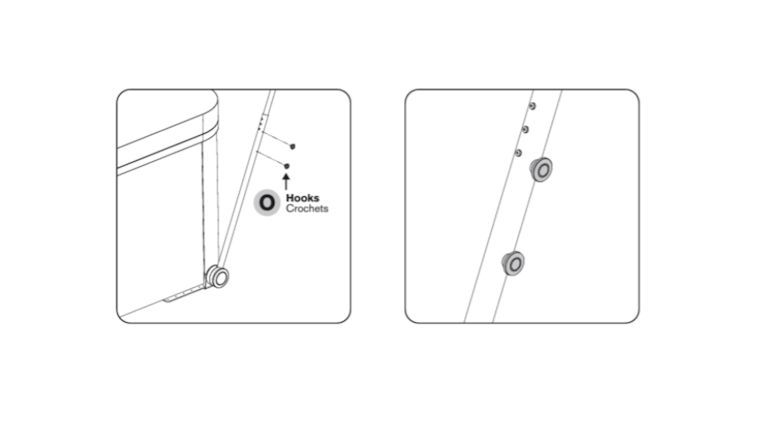
  • Step-by-Step Installation. Follow eight simple steps, from positioning brackets to securing tubes and attaching towel hooks.
  • Final Check. Ensure all components are securely fastened and aligned for safe, smooth operation.

What spa models are compatible with Spa Cover Lifter - Deck-mount / Under spa mount?

The Spa Cover Lifter (Deck/Under Mount) is compatible with Vortex™ and Fisher™ spa pools and swim spas recessed into a deck, as well as standalone or deck-installed Jacuzzi® J-200™ and J-300™ Series set-up.

Watch: Spa Cover Lifter - Deck-mount / Under spa mount

What parts come with the Spa Cover Lifter - Deck-Mount/Under-Spa Mount?

Before starting the installation, make sure you have the following parts included:

Spa Cover Lifter - Deck-Mount/Under-Spa Mount parts
  • Brackets (A)
  • Plastic Covers (B)
  • Bumpers (C)
  • Side Tubes (D)
  • Plates (E)
  • Nuts + Lock Washers (F)
  • Thread Forming Screws (K)
  • Towel Hooks (O)

These components are crucial for the assembly process, so double-check before proceeding.

Spa Cover Lifter - Deck-mount / Under spa mount | Step-by-Step Installation Guide

Follow this guide to easily install your spa cover lifter. We’ll walk you through every step!

Step 1: Position the Brackets

Deck-mount / Under spa mount_Brackets
  • Raise the spa slightly to position the brackets (A) beneath each side.
  • Ensure the brackets are placed 3 inches (7.6 cm) from the back of the spa.

Step 2: Place the Plastic Covers

Plastic Covers_Deck-mount / Under spa mount
  • On each side, place the plastic cover (B) on the bracket.

Step 3: Attach the Side Tubes and Bumpers

Side Tubes and Bumpers  Deck-mount / Under spa mount
  • Place the bumpers (C), side tubes (D), and plates (E) onto the brackets.
  • Use nuts and lock washers (F) to fasten them securely.

Step 4: Clip the plastic covers

plastic covers Deck-mount / Under spa mount
  • Clip plastic covers (G) onto the corner tubes for added stability.

Step 5: Fix the Corner Tubes

Corner Tubes Deck-mount / Under spa mount
  • Install the handles (I and H) and join all corner tubes together (J and L) using a drill and thread-forming screws (K).

Step 6: Attach Foam Tubes and Align the Top Tube

Install the Foam Tubes and Top Tube:

  • Slide the foam tubes (N) and the top tube (M) over the corner tubes.
  • Align them with the middle of the spa cover.
Side Tubes Deck-mount / Under spa mount

Insert the Corner Tubes into the Side Tubes:

  • Complete the assembly by inserting the corner tubes into the side tubes.

Step 7: Secure the Tubes with Thread Forming Screws

Thread Forming Screws Deck-mount / Under spa mount
  • Fix all tubes together using a drill and thread-forming screws (K).

Step 8: Install the Towel Hooks

Towel Hooks Deck-mount / Under spa mount
  • Attach the towel hooks (O) to each side of the lifter.
  • Ensure everything is securely fastened and aligned.

In Summary

By following these instructions, you can successfully install your base-mounted spa cover lifter, making spa use more convenient.

Remember to prioritise safety during the process and double-check all connections to ensure a secure setup.

Got more questions? We’re here to help!

Related Articles

Five Star Trust Pilot Rating

We are proud that Spa World customers have given us a Five Star Trustpilot rating.